- Home
- Raw Food Recipes and Resources
- Make Your Own Soy Milk
Make Your Own Soy Milk
A Quick and Easy Recipe
By Carly Schuna

After I wrote and submitted a recipe for granola that features Rejuvenative’s sunflower seed butter, the company’s CEO gave me a call. He wanted to talk about the soy milk in the recipe. Even though I had called for the unsweetened variety, he expressed concern because most soy milk sold in stores is made with genetically modified soybeans and packed with preservatives. In essence, he wanted to make sure the recipe was about fresh, pure foods and that it didn’t contain anything artificial.
When I told him that I make my own soy milk rather than using store-bought, he asked me to share my recipe. If you follow a dairy-free or vegan eating plan and drink a lot of soy milk, making your own can not only save your health but also save you hundreds of dollars a year.
Ingredients and Supplies
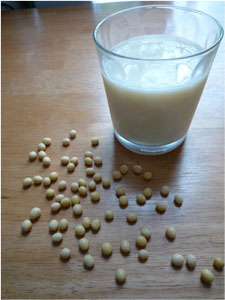
- 1 c. dry, organic soybeans
- 8 c. water, plus water for soaking
- Pinch of sea salt
- Honey, maple syrup, or Brazilla to taste (optional)
- Blender
- Cheesecloth and colander or fine sieve with paper towels
Process
First, put the dry soybeans in a bowl and pour enough cold, filtered water over them to cover the beans by at least 2 inches. Soak the beans for about eight hours or overnight.
Drain the water from the soybeans and rinse them several times with fresh water. Look over the batch and pick out any soybeans that look suspect or that haven’t expanded during the soaking time.
Pour the rinsed soybeans into a blender and add about 3 cups of fresh, cool water. Blend the bean mixture until it’s smooth and creamy.
Set a large stockpot on the stove over medium-high heat. Pour in the blended soybean mixture and add 5 more cups of water. Heat the milk until it begins to boil, then turn the stove range down to a simmer. While the milk is simmering, it will foam. Use a sieve or large, shallow spoon to skim off as much foam as possible.
Keep the milk simmering at low heat for about 15 minutes. Then turn off the stove and set up your straining device. Set either a cheesecloth-lined colander or a fine-mesh sieve lined with paper towels over a large bowl. Pour the warm soy milk into the strainer and let it drain. When it cools, press undrained soy milk out through the sieve or squeeze it out through the cheesecloth. If your final soy milk seems grainy, pass it through the sieve again once or twice.
Once strained*, your soy milk is ready to use! Flavor it with a pinch of sea salt and honey, maple syrup, or vanilla. Store the soy milk in the refrigerator and use it within a few days, since it’s preservative-free.
*The leftover soy pulp, called okara, can be used in baking. Try adding it to muffin batter, pancake batter, or bread dough.

